Showing posts with label pretty. Show all posts

Friday, August 22, 2014

pretty: and we have a winner...

I don't know about you but I'm the type of person who enters select contests never thinking I'd win. I've never been lucky...or maybe not as lucky as some other people I know. When it comes to online contests, I enter and forget about them, figuring I'd receive an email if I won or some kind of social media alert. I entered an Instagram contest by Cult Nails (@cultnails) and guess what? I WON! All I had to do was repost their image, tagging them and entering their specific hashtag. I never thought I would win but I thought something was weird when I woke up one Saturday morning with all  kinds of Instagram notifications. Here's their winner announcement:

After some short communication with John (@jmorockstar), I received an email notification that my package was on its way--wahoo! Here's my winning box:
Hand hiding my address
And Mischief checking out the goodies inside:
Mischief decided that he liked the red tote the most. He used it to step on, stretch on and sit on before I could unwrap all the polishes and take a proper photo.
Here's everything unwrapped minus Mischief:
One half of the polishes and tote bag. The polishes are (left to right): Wicked Fast (speed dry top coat), Charlatan, Just Because, I Got Distracted, Masquerade, Ms. Conduct, Nevermore, Tempest (this one doesn't have a label on the bottom so I did a comparison on the Cult Nails website) and Doppelganger,
Second half of the polishes plus nail file and t-shirt. Polishes are: Feel Me Up, All Out, Be Loco, Captivated, Evil Queen (a gorgeous red I can't wait to try), Riot, Hypnotize Me, Party Time and Get It On (base coat).
I had a hard time deciding between which polish to use first...yellow or red for the end of summer or brown for the beginning of autumn? In the end I decided that I was done with summer and ready for autumn! I painted one coat of Ms. Conduct followed by one coat of Masquerade and top coat.
The Cult Nails polishes are free of DBP, formaldehyde, toluene and camphor. I found the two polishes I tried to be one coaters, though you could do two thin coats if you really want to. The polishes dried fast but not too fast that I didn't have time to smooth things out. One thing that I found truly remarkable is that I am SO used to the Pro Wide Brush with OPI polishes that I find myself having a hard time applying polish with other brand names (Essie, I'm looking at you). I'm happy to say that I didn't have the same problem with the Cult Nails polishes even though their brush isn't wide like OPI's. The bristles on the CN brush fan out rather nicely and considering I have wide nail plates, I found applying the polish a breeze. A non-wide brush is a huge pet peeve of mine since I can't seem to apply other polishes properly without one. Regular polish brushes never really even out on my nail plates and just leave my nails looking like a streaky mess. As you can see above (aside from some clean up that needs to be done but I was too excited to do it), applying the Cult Nails polish was rather easy.

I am so happy that I can now add these 18 polishes to my collection of Cult Nails polishes, which previously consisted of one, lonely polish, Feedback. Thank you so much Cult Nails for giving us the opportunity to win and fall in love with your products! I see a lot more manis with Cult Nails in my future :)

Monday, August 11, 2014

pretty: manicure monday (glittery water decals)

Here's my first attempt at a manicure using water decals. If you're not familiar with water decals, they work the same way temporary tattoos do; you cut the image you want, soak it in water for 10-20 seconds, slide the image away from the soaked paper backing and then place it onto your nail. Okay, so it only sort of works the same way temp tattoos do, ha! I was wary of using water decals because it seemed like a hard procedure but let me tell you, it was super simple! As long as you have all your materials ready to go, applying the water decals is a snap!

Here's how it works:
Prep your nails and apply a base colour. I used three thin coats of OPI Gargantuan Green Grape followed by Essie To Dry For to speed up the drying process. I then gathered all of my water decal materials and got to work.

Tools to gather:
- water decals
- small bowl with warm-ish water
- scissors
- tweezers


Here's a close-up of some of the decals I used:
Make you sure submerge the whole decal in the water because if you just drop the decal in, most likely it'll float and the decal won't come off the paper backing properly.
After 15-20 seconds, remove the decal from the water with your tweezers, place on a fingertip and separate from the paper backing with a slight rubbing motion between your thumb and index finger. Another option is to use your tweezers to slide the decal to the side of the bowl and using your index finger, slide it off the backing. I hope that makes sense because I have no image of that. Anyway, this is what it'll look like on your finger:
Carefully place the decal on your nail trying to get it into the correct position on the first attempt. Don't sweat it if you can't because you can slide the decal around as long as it stays slightly damp. It's best not to mess around with it too much in case you end up tearing the decal, which I definitely ended up doing, oops! Once your decal is in place, give it a few seconds for the remaining water to dry and then smooth out any wrinkles.
Apply as many decals as you want! Here's my finished water decal manicure including a glittery accent nail in OPI Spark De Triomphe from the Serena Williams Grand Slam series.
I also decided to add a little glitter using OPI Pirouette My Whistle. Here's a close-up:
So add a little bit of decal pizzazz to your mani and let me know how it goes!

Monday, August 4, 2014

pretty: manicure monday (glitter gradient)

So technically it's Tuesday but it's always glitter time! Here's one of my favourite glitters of all time, Fluffy Macaroons from Loaded Lacquer. From the Loaded Lacquer website, Fluffy Macaroons is described as a clear base with "plum, periwinkle, yellow, marigold, cotton candy pink, purple and white hex and squares and holographic sparkle." It is unbelievably awesome! All kinds of pastel shades and shapes in a clear base. I decided to do a gradient with the glitter polish using OPI Skulls & Glossbones as my base. It's a fantastic grey that isn't too dark or too light. It's pretty much the perfect shade for any nail art including stamping, glitters, etc.
Matou wanted the check out the glitter action.
I don't know about you but the easiest way for me to do a glitter gradient is to start with the smaller glitter on the brush and applying that about halfway from one end and then let it dry slightly and slowly build up more glitter. I tend to have a problem getting the bigger pieces on and it's even harder for me to fish them out of the bottle so I swirl my brush around the bottle then wipe the excess on the inside of the neck of the bottle. That way I can then "pick" up the specific glitter from the neck of the bottle. I hope that makes sense. Maybe a video would be best in this instance because that's the best way I can explain it.
 Here's a sort of close-up of the finished mani. Photographing glitter in the sun with one hand is actually really hard!
This is more of a "true" colour swatch of the OPI polish.
That's it for this Monday!

Saturday, August 2, 2014

pretty review: mascara wars!

If you're anything like me, then you love mascara. I've spent hundreds of dollars over the past decade alone trying to find a mascara that would work magic on my short, straight, slightly downward-pointing Asian lashes. Oh how I covet Sean's long and curly lashes! From high-end to drugstore brand, I've probably tried the majority of mascaras on the market and have avoided the ones that I know just won't work (CoverGirl, I'm looking at you). Join me in this long and photo-heavy post as I run through a recent sampling of my path to the perfect mascara.
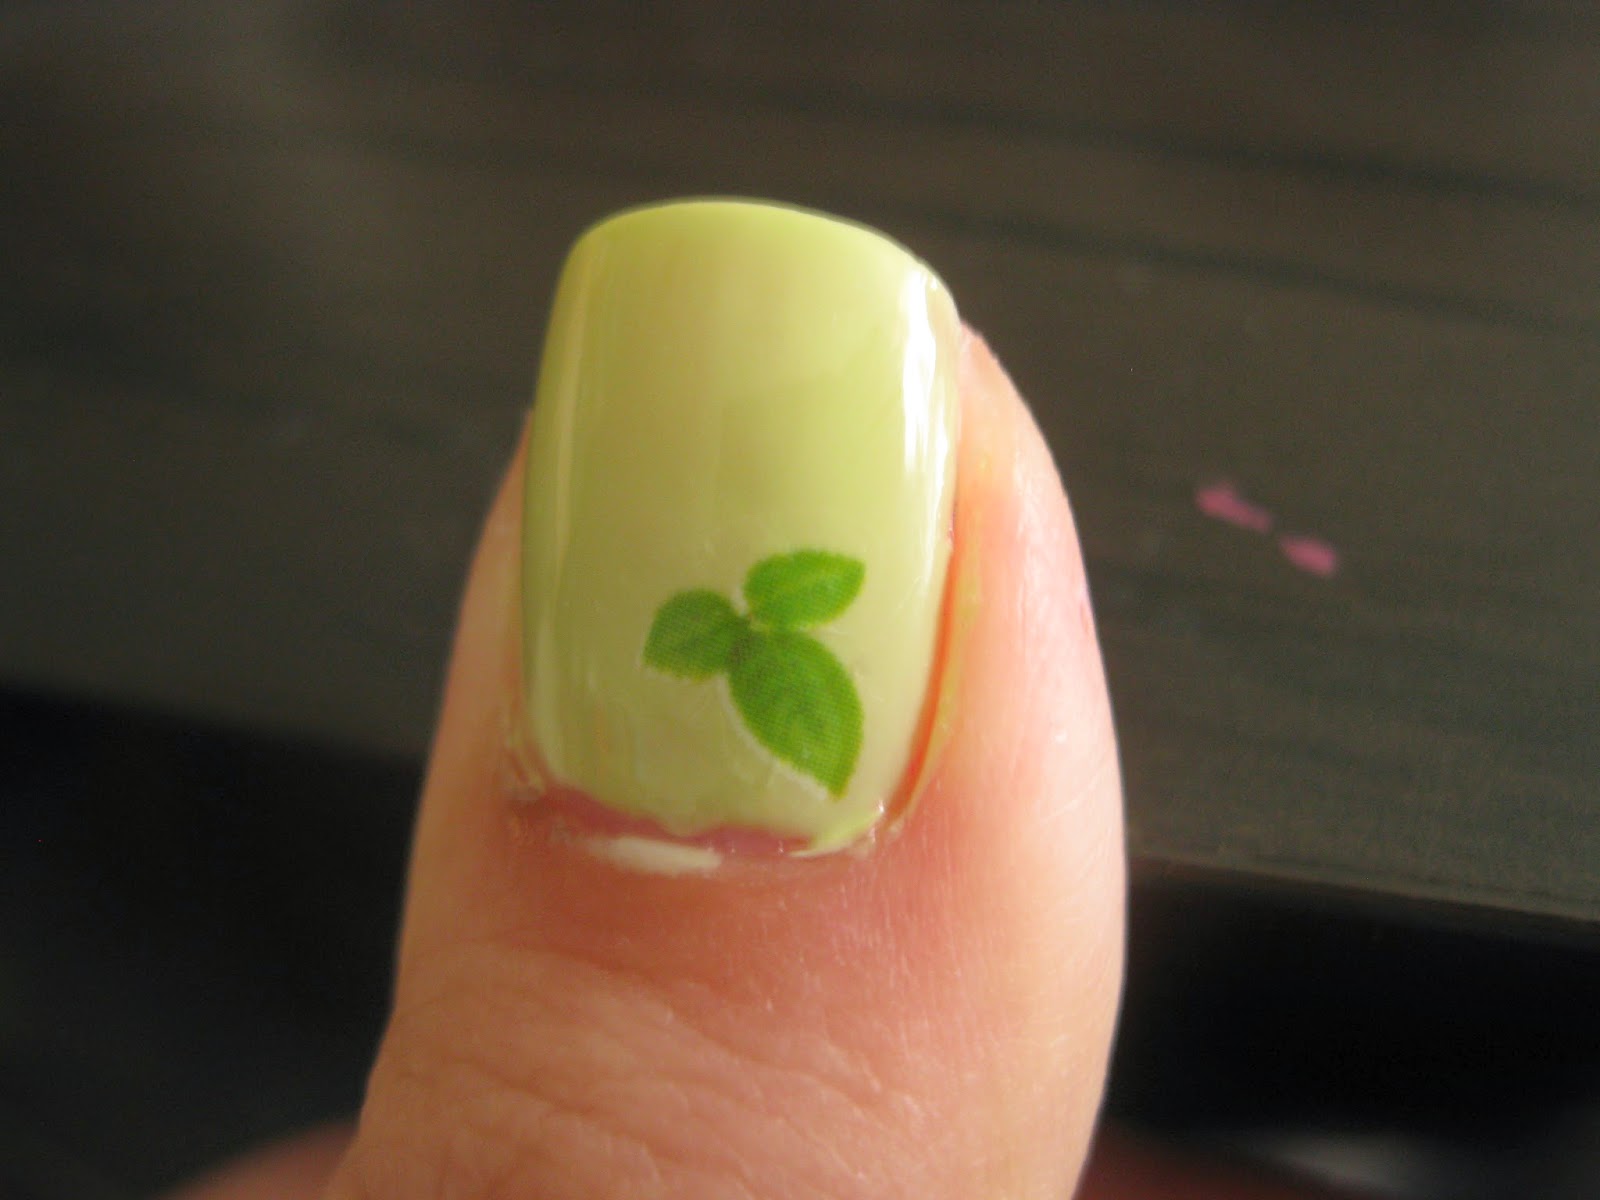
The contestants for this round.
Let's start from the beginning. On days when I plan on wearing makeup, mascara is a must. I always curl my lashes beforehand with my trusty Shu Uemura eyelash curler, which really does wonders for Asian eyelashes. I've tried the Western brands with various outcomes and always come back to my good, ol' trusty SU eyelash curler. I've gone through at least five in my lifetime but I don't really know what the general rule is for changing up your eyelash curler or just the pads really.

So after using the eyelash curler in which I do the "3-step method," I apply my super reliable and trusty Shu Uemura Basic Black Mascara, now discontinued. It was super duper in the way it held the curl in my lashes and lasted all day. It wasn't clumpy and didn't look too over-the-top for daily use. It was perfection! And then they discontinued it :( I then started using Precise Volume Mascara by SU as well but as you can imagine (or maybe not, it's kind of gross), because of the price tag I used that mascara for years! YEARS! I actually still have it but can't remember the last time I bought a Shu Uemura mascara. All I know is that it was from Sephora but do they even carry Shu products anymore? I have no idea. I should probably not think about it. The reason I couldn't let it go is because it was the perfect replacement for Basic Black. It was waterproof, provided volume and length and made my lashes long and voluminous without looking too "done." And that's what I look for in a mascara: volume, length and waterproof. The only downside with Precise Volume is that it was a bit difficult to remove. Unless I used a creamy, slightly greasy (oil-based) makeup remover, there were always little bits of mascara left on my lashes and in the morning I'd wake up with a bit of mascara on my lower lash line.

Only recently did I think about tossing my beloved Precise Volume Mascara for something similar but without the steep price tag. And so here begins the Mascara Wars! Photos of the tube as well as the wand are available and then my review of each mascara. Sit back and relax (preferably with a drink because this is a long one).

Revlon Lash Potion Volume & Length Waterproof Mascara by Grow Luscious
I felt like this mascara was going to be promising. Volume, length and waterproof? Sign me up! This wand is triangular in shape with triple grooves (according to Revlon's website). The pros to this mascara were that it did lengthen and amp up my lashes, however, the waterproof formula left a lot to be desired. Waterproof formulas tend to be less "wet" and therefore set quickly but this mascara surely didn't. My curl died within a minute. Boo.

Dior Diorshow Waterproof Mascara
After I had read all the rave reviews about Diorshow Waterproof mascara, I had to try it out for myself. Promising to curve lashes to the nth degree, how could I resist? Sadly, this wand was so big that while it did an awesome job of lengthening and thickening my lashes, no matter how widely I opened my eyeballs to let the formula set, it smudged onto my eyelids. It was impossible to avoid. Even after the formula had set, the monolid "set in" and my curl was gone. So I don't think that this waterproof mascara was waterproof enough for my lashes. Oh and here's a look at the super big brush wand:
Another disappointment especially considering how many people rave about this mascara. If you have lashes that are already slightly curly and are just looking for volume and length, this is definitely for you. If anyone out there with a monolid has had luck with this mascara, please tell me your secret!

Shu Uemura Precise Volume Mascara

As you can see from the photos above of the brush wand, there's a thick and thin side which makes application a breeze. You can customize your look with the help of the wand and the formula from this mascara was perfection! It was glossy and waterproof and held my curled lashes all day long. I loved it. I loved it so much that I probably used the same tube for a good three years. Shocking, I  know. Even I'm shocked now that I hear you're supposed to change your mascara every three months. Here's the wand up close which shows just how perfect the bristles are. They grab your lashes and keep them volumized while also clump-free.

Maybelline Great Lash Waterproof Mascara
A tried-and-true favourite amongst makeup artists and consumers alike, I think I've given this mascara a try at least thrice in the past. Usually one of the cheapest mascaras in the beauty department of any drugstore, I purchased mine at $5 from Walmart, but I know I've paid a couple of dollars more in the past.
The formula for this mascara is super black and glossy and the brush is a lot smaller compared to Diorshow Waterproof. It's a bit like an oval: bigger in the middle than the sides though you can't quite see that in the photo above. It's a nice formula but again, the same old problem happens, the formula doesn't set fast enough for my curled lashes to hold. The become a straight but volumized and lengthened mess in minutes. For the price and the size of the brush, this is a great lower lash mascara for my almost non-existent bottom lahes.

Anna Sui Super Mascara DX Waterproof 
Oh Anna Sui, you always have such pretty packaging! The AS line has a few mascaras to choose from but I chose the waterproof version for obvious reasons. You can see how long and thin the brush is...perfect to get those hard-to-reach short end lashes.

The thin brush is great and the formula is super black and glossy. The only problem I had with this mascara is that it really is waterproof. It should be called mega waterproof or something like that because one coat throughout your lashes is probably all the time you're going to have before it sets in place.

Be A Bombshell Lash Out Mascara

I received this  mascara in my June Ipsy Glam Bag and while it did great stuff for my lashes, which I'll get to in a moment, it does have a very chemically scent to it.
I did use it on my lashes despite the scent because I wanted to know if it worked. Described as a "rich pigmented mascara...that offers a multidimensional look," I have to say that it did what it said it would. My lashes were noticeable longer and thicker though I didn't notice that "multidimensional" look because I didn't apply it to both sides of my lashes as directed by the instructions. I felt like that would have weighed down my naturally thin lashes. It didn't keep my curl one bit but I really liked the formula. If they added waterproof version to their line and removed the chemical scent, I'd definitely be a future buyer. Another interesting thing I noticed when removing this mascara is that it came off in "tubes" similar to Blinc Mascara. I don't know if that's what was supposed to happen with the mascara but it was a welcomed surprise and made mascara removal easy peasy!

L'Oreal Illegal Lengths Fiber Extension Mascara
I had read great reviews of this mascara for women with straight, thin lashes. I went out and bought this on those recommendations and let me tell you, it's great! It lengthens your lashes to a whole different level. I could actually see and feel my lashes pushing back against my eyelid. A bit bizarre but the length was definitely there and the brush does a great job at keeping your lashes separated. The brush is actually kind of like a triangle. The bristles come to a slight point on three sides. I suppose this is to keep your lashes separate and clump free but I normally don't have that problem since I only typically apply two coats. The only negative is that it tends to make my eye sting a little bit. I don't know if that's normal as it only happens to one eye (my right) but it happens every single time. A little bit of a sting and then my eyeball wants to tear up.

L'Oreal Voluminous Miss Manga Waterproof Mascara
So I was really planning on waiting to purchase this mascara until I had read more reviews of it but when faced with the numerous online ads, magazine ads and poster ads for this in-store, I couldn't help myself. "It's all in the name of research" I said to myself as I stood at the wall of mascara in Walmart. The first thing I'll say about this mascara is that I hate the packaging. The tube is so wide and fat that it hardly makes for stashing in your purse. It would practically take up one-third of my evening clutches with little room for my phone.
 
But then I say, look at the wand! See that little notch in the applicator about a third of the way down? That's what L'Oreal calls its "360 degree Flexor Brush" that allows maximum application to upper and lower lashes. I have to say that it does a great job and applying mascara on both the bottom and lower lashes but it does take some getting used to. It's kind of springy in its application and though it probably does move back and forth quite easily, it doesn't with my lashes. There's just the slightly bend where the notch is. Even so, the mascara applies like a dream, separating and lengthening my lashes as it holds the curl with its waterproof formula. I love it the mascara. I hate the tube.

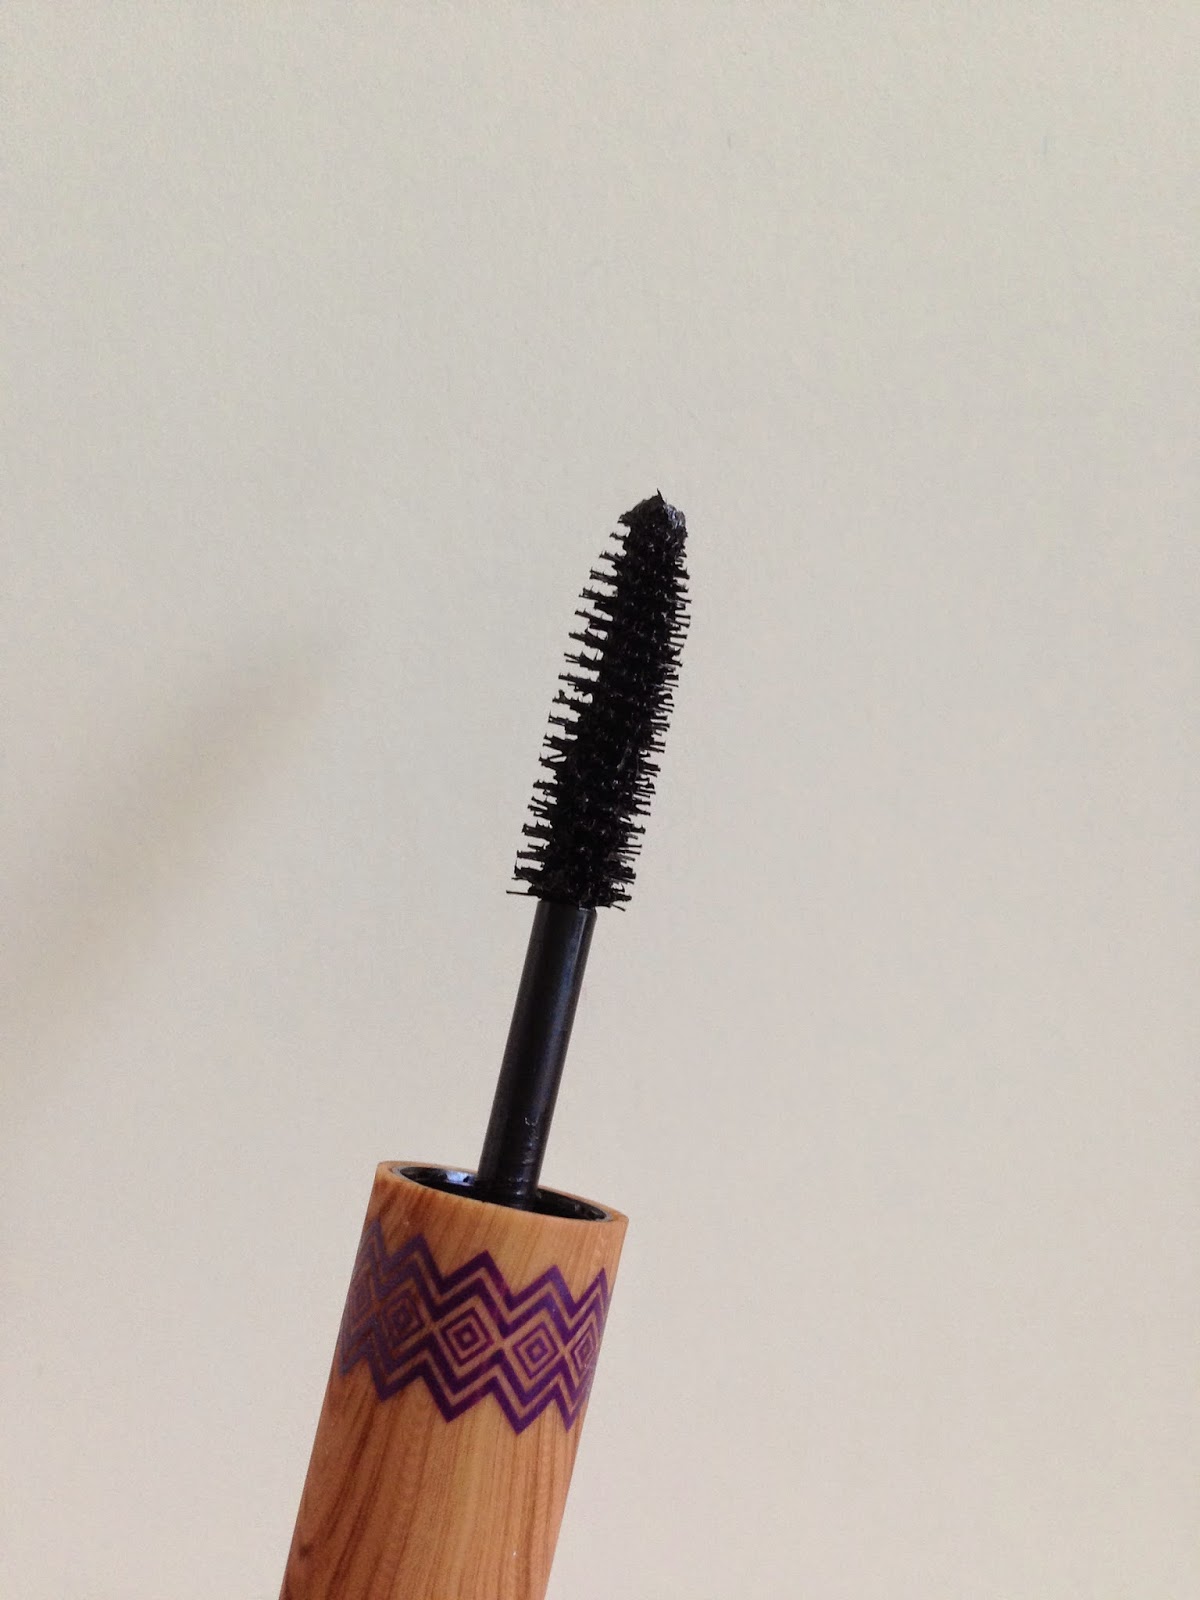
Tarte Gifted Amazonian Clay Smart Mascara
Gifted to me by Sephora via their Beauty Insiders program, I actually selected the Tarte set because of its bronzer, Park Avenue Princess. I tried out the mascara and while it claims to offer all kinds of health benefits to your lashes over use, it did nothing to hold my curl. The brush is really nice too. I don't know if this is the regular brush as I received a sample, but it's got a nice shape and size to it. I also really like the fact that it doesn't contain GMOs, triclosan, petrochemicals, synthethic fragrances or dyes and the like so I'm really interested in trying the Lights, Camera, Splashes, Waterproof mascara that Tarte offers.
Phew, well I think that's it. There was just a quick sampling of the nine different mascaras I've tried in the recent past. I have a few others on my list, specifically L'Oreal Telescopic Shocking Extensions Waterproof Mascara which I'm currently having a hard time finding. Until then, let me know what your favourite mascaras are!

Wednesday, July 30, 2014

pretty review: the face shop

A quick intro to The Face Shop: a Korean company specializing in skincare, makeup and nails. The Face Shop recently opened up a bunch of stores in the GTA area and lucky me, there are three I can visit without much effort. On a recent trip I picked up a sheet of water decals for the nails and a hand cream.


Daily Perfumed Hand Cream in Green Tea (30mL/1oz.): This looks like an updated version of The Face Shop's previous Green Tea Hand Gel Cream. I decided to give it a shot because I was looking for a small enough hand cream that I could keep in my purse for on-the-go hand moisturization. The product comes in a acrylic paint-like tube which I find kind of annoying because the tube ends up with all kinds of dents and dings which really bother the type-A in me. There are a variety of scents for the hand cream including berry mix, apple pop, tiare, rose water and the scent I chose, green tea. While there were testers in the store of each scent (The Face Shop has testers of I think, every single product in their stores), my full hands chose what I thought would be the least offending one. Being very sensitive to smells I thought green tea would have a mild, fresh scent and I was not disappointed. It's fresh and light and doesn't give me even a whiff of a headache. I would even consider this scent a-okay for men to use and will get feedback from my partner later. Unfortunately this hand cream doesn't really do anything for my hands. Other than making them smell nice for a short amount of time, I find the gel-like consistency to not do anything to retain or add any much-needed moisture. Then again, my hands are super dry thanks to a super-dry condo in the wintertime and excessive hand usage including washing dishes. I like it for the scent but people with medium-to-extremely dry hands would be best to use something different.

Lovely me:EX Water Decal Nail Sticker in 02 Flower Garden: There are five different designs of water decals from The Face Shop but the store I went to only carried two, probably because the others were already purchased. This set includes red, pink and white roses of various sizes as well as some leaves, single bud roses and Gerbera daisies. I kind of wish there were more variety seeing as how it's labelled "Flower Garden" but I guess the variety of colour should suffice.
I found these much harder to apply than the water decals from The Born Pretty store (which you'll see a review of soon). They wrinkled on my nail plate and a top coat didn't help to smooth things out. They were also more fragile than the Born Pretty Store selection as I ended up tearing a few in half. The good thing about these is that you do have some time to get your water decal into place whereas some other types don't give you that leeway; you're kind of stuck with whatever placement you do with your first application.

I can't recall the price on these two items but I believe the cream was less than $10 and the water decals were less than $5. While I'm not crazy about the hand cream for its gel consistency, I will say that I'm not completely displeased with the water decals. I'd definitely give another design a go though I didn't see any other design from the Internet that I was crazy about. I suppose that if The Face Shop were to release more of these decals in different designs I'd definitely be up for checking them out.

Saturday, July 26, 2014

pretty review: topbox july 2014

I literally just lost my entire entry for this post because my new laptop is driving me crazy. If you're thinking of purchasing a new laptop and are thinking of Lenovo, think again. This IdeaPad has been driving me crazy ever since it was gifted to me and the only reason I keep using it is because my older laptop (Dell, I love you!) only has 3GB of space left on it.

So here we go again and hopefully I can make this post more concise than the first time around.

My package for Topbox arrived on the 16th of July and when I opened the bubble mailer, this is what I received;
Now don't get me wrong, I'm sure Neostrata products are awesome but aren't I a little bit young to be receiving anti-aging products? I know I'm not quite a young'un anymore but I thought I had a few good years ahead of me before having to worry about wrinkles and fine lines and aging spots.

I ended up posting on Instagram about my displeasure with the products I received and a comment was left that there was a mix-up with the shipping of packages by Topbox this month and was instructed to email them so I could receive the proper package. A rep from Topbox confirmed the error and later that night I emailed Topbox. A couple days later I heard back from Topbox and was told that the proper package was being sent to me and the next business day I received this:
The Benefit Cosmetics-specific products for this month's Topbox. I was beyond thrilled about having received the proper package but even more thrilled about the excellent customer service. Hats off to Topbox for correcting their error. I hope that any of Topbox-ers out there who received the incorrect package are able to receive the proper one as well. Now let's move on with a quick review of the mini samples.

It's upside down...oops.
Gel formula at very top
They're Real! Push-Up Liner: I was very excited about receiving this liner...it's basically the only reason I chose the Benefit Cosmetics option. It claims to be a gel formula with an innovative applicator that allows precision lining of the eye. What I liked about the eye liner is umm...uhh...nothing? Here's the deal: I was looking for a one step eyeliner. Currently I use a MAC 263 brush and the Blacktrack Fluidline (gel liner) to line my eye. It's precise and amazing. I can line my eye with a thick or thin line and control exactly how it goes on. I can create a winged look or none at all. The only downside is that it's a two product process. As soon as I saw this liner I thought, "awesome, it combines the applicator of an angled brush and formula of a gel liner in one!" I was excited, like super excited. Then reality sunk in. You have to squeeze the tube below the applicator for the formula to appear but if you squeeze too slowly nothing happens and if you squeeze too quickly a whole glob of gel liner comes out and makes a big mess on your eyelid. So that's what happened to me...a big, thick line of eyeliner on my eyelid and what's worse is that at the end of the day, my eyes looked like an even bigger mess. The liner definitely smudged despite using eyelid primer and despite its claims of being waterproof and budge-proof. This was definitely a letdown.

They're Real! Mascara: Short and sweeet, this mascara did nothing for me. According to Sephora this mascara "lengthens, curls, volumizes, lifts, and separates lashes for a spectacular 'out-to-here' look." I find the formula too "wet" to keep the curl in my lashes after I use Shu Uemura's eyelash curler and that's the main thing I look for in a waterproof mascara. Simply disappointing. I had received this sample twice before with a couple Sephora orders so I knew this was going to be gifted to someone who can take advantage of this. It does have rave reviews on the Sephora website so if your lashes are already curly, I'm sure this would work wonders for you. Unfortunately, my sparse and straight Asian lashes have a mind of their own.

They're Real! Remover: This creamy gel formula claims to remove waterproof makeup without yanking at your eyelid or eyelashes, a fault of many makeup removers. I'm currently using a gel makeup remover that I like but don't love. It doesn't remove all traces of my eye makeup but it is gentle enough for my ridiculously sensitive eyeballs. Here's a couple swatches of the product itself:
Rubbing the product onto the back of my hand (top right) really made the creamy gel formula noticeable. It's super creamy and a bit on the thick side. The application process was a bit tricky. The tube instructs you to saturate a cotton pad and gently remove all traces of eye makeup. Well, the formula is so thick that you don't saturate so much as...I don't know...slap and smudge it on like a thick paste? That's a terrible description but it really is thick. To "saturate" a cotton pad you would have to use the majority of the sample sent. Next came actually removing my makeup. It did a good job removing my primer and eyeshadow but the mascara was a whole other story. The makeup remover didn't live up to its claim of removing waterproof mascara easily. With how thick this product is and how much one would have to use to completely saturate a cotton pad, I'll stick with my current waterproof makeup remover. *Added: I thought about using this with the same method as a cleansing oil and guess what, it worked! Just squirt some of the makeup remover on the pads of your fingers and rub your fingers together to spread the product out. Then apply to your eyelids in a circular motion being careful of your eyelashes and making sure you don't get any product in your eye. Rinse off and wipe gently with a towel and you're done! The makeup remover did a way better job removing my mascara this way so I think I'll continue to use it as a "cleansing oil." I don't think it'll replace my current makeup remover but I'm glad I found a method of using this makeup remover that actually works for me.*

Just a tad too dark
Came with sponge applicator
Stay Don't Stray in Medium/Deep: This concealer and eyeshadow primer promises to make your products stay put. The Medium/Deep shade was a bit too dark for me so I only applied it on my eyelid since I didn't want to give myself a weird dark circle around both my eyes. While I'm used to Urban Decay's Eyeshadow Primer Potion (in Eden, great match for my skintone), the Stay Don't Stray did a decent job at keeping my eyeshadows in place. I did a test run with shadows from the UD Naked 3 palette. At the end of the day the shadows were pretty much in the same place but I noticed that the pigmentation of the shadows was more pronounced with UD's Eden eyeshadow primer. So the Stay Don't Stray won't be a brand changer for me but I will use it up until it's gone...just won't be purchasing a full size in the future.

So that's it for July's Topbox. While I didn't find anything that wowed me, I was pleased with the customer service I received and will continue with my Topbox subscription. I figure I'll give it another go before I decide whether I should "stay or stray." (Hahaha *groan*)